Connection
Connecting sends you to Slack to approve Klef’s access.Setup
Connect as a workspace owner or admin who will stay one. Slack accepts provisioning calls only while the person who approved Klef holds that role. On Enterprise Grid, Klef is installed on the organization and then added to each workspace whose channels it manages. A member Klef creates there belongs to the organization but to no workspace, so before inviting them to a channel Klef adds them to that channel’s workspace:1
Approve Klef for the organization
Connect Slack in Klef, and on Slack’s approval screen pick your organization under Your
organizations, not one of its workspaces. Slack accepts provisioning calls only from an app
installed on the organization.
2
Add Klef to your workspaces
In Slack’s admin dashboard, open Integrations → Installed apps, click ⋯ next to Klef
(access level Organization), and choose Add to more workspaces. Pick each workspace whose
channels Klef should manage, then confirm with Add App. Until Klef is in a workspace, it can’t
read or grant that workspace’s channels.
3
Choose who can use Klef
Slack asks Who can use Klef? Klef has nothing for members to use, so pick No one.
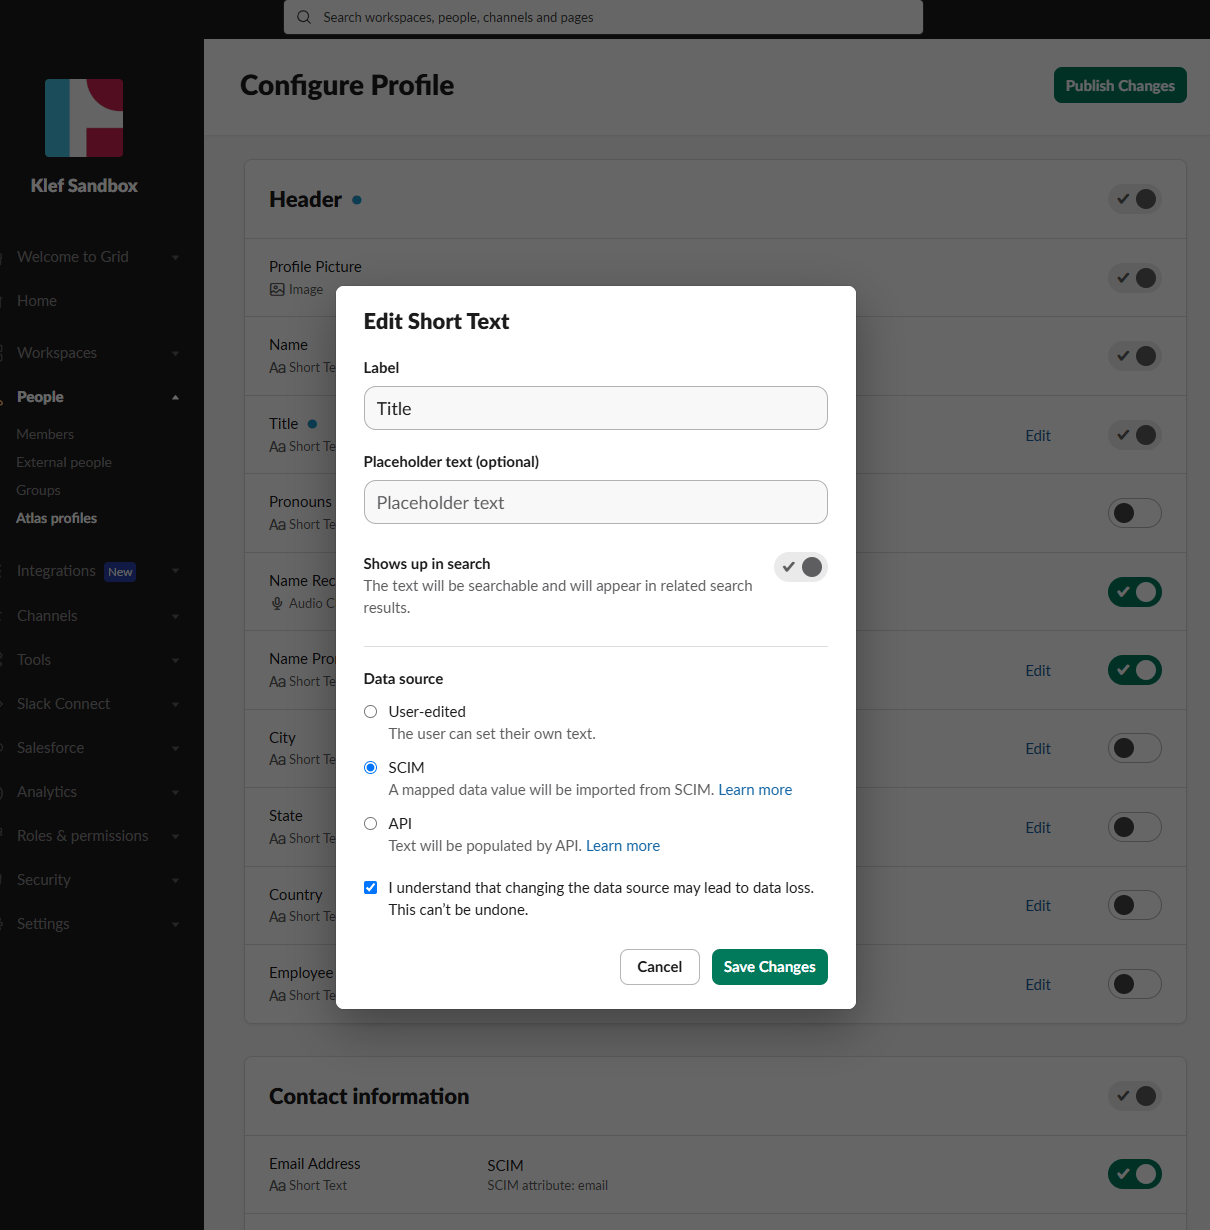
Let Klef update titles
This is optional. You need it only when a policy mapstitle. Slack keeps a title Klef writes only
when the profile field’s data source is SCIM. Otherwise Slack accepts the change and drops it, so
every plan proposes it again.
1
Open the profile settings
In Slack’s admin dashboard, open People → Atlas profiles (Profiles on some plans), then
choose Edit next to Title.
2
Set the data source to SCIM
Under Data source, choose SCIM and tick I understand that changing the data source may
lead to data loss. Slack won’t save the change without it. Click Save Changes, then
Publish Changes.